App Sync - Amplify 를 이용한 App Sync Data Subscribe.
해당 예제는 DynamoDB 테이블을 Data Subscribe 하는 App Sync 예제 입니다. 2022년 2월 10일 기준으로 동작 확인 및 작성되었습니다.
1. Amplify CLI 다운로드 및 설치 링크
window 기준, cmd 혹은 powershell 에서 아래 링크를 실행.
curl -sL https://aws-amplify.github.io/amplify-cli/install-win -o install.cmd && install.cmd
2. 프로젝트에 세팅하기
- 작업이 Spring Boot 프레임워크에서 이루어졌기 때문에 경로는 Boot 기준입니다.
프로젝트 세팅 cmd 혹은 powershell로 프로젝트 루트에 접근 후 아래 명령 실행
amplify init
이후 나오는 선택은 아래와 같이 진행하였으며, 다른 경우 상황에 맞게 선택합니다.
Note: It is recommended to run this command from the root of your app directory
? Enter a name for the project acaasweb
The following configuration will be applied:

Project information
| Name: webTest
| Environment: dev
| Default editor: Visual Studio Code
| App type: android
| Res directory: app/src/main/res

? Initialize the project with the above configuration? No
? Enter a name for the environment dev
? Choose your default editor: Visual Studio Code
? Choose the type of app that you're building javascript
Please tell us about your project
? What javascript framework are you using none
? Source Directory Path:  src/main/resources/static/js/graphql
? Distribution Directory Path: dist
? Build Command:  npm.cmd run-script build
? Start Command: npm.cmd run-script start
Using default provider  awscloudformation
? Select the authentication method you want to use: AWS profile
저의 경우, AWS profile은 따로 C:\Users{userName}.aws 에 credential 파일로 저장되어 있습니다.
3. App Sync 에 생성된 API 연결하기
AppSync에 접속하여 연결하고자 하는 API를 조회하면 다음과 같은 화면이 있습니다.
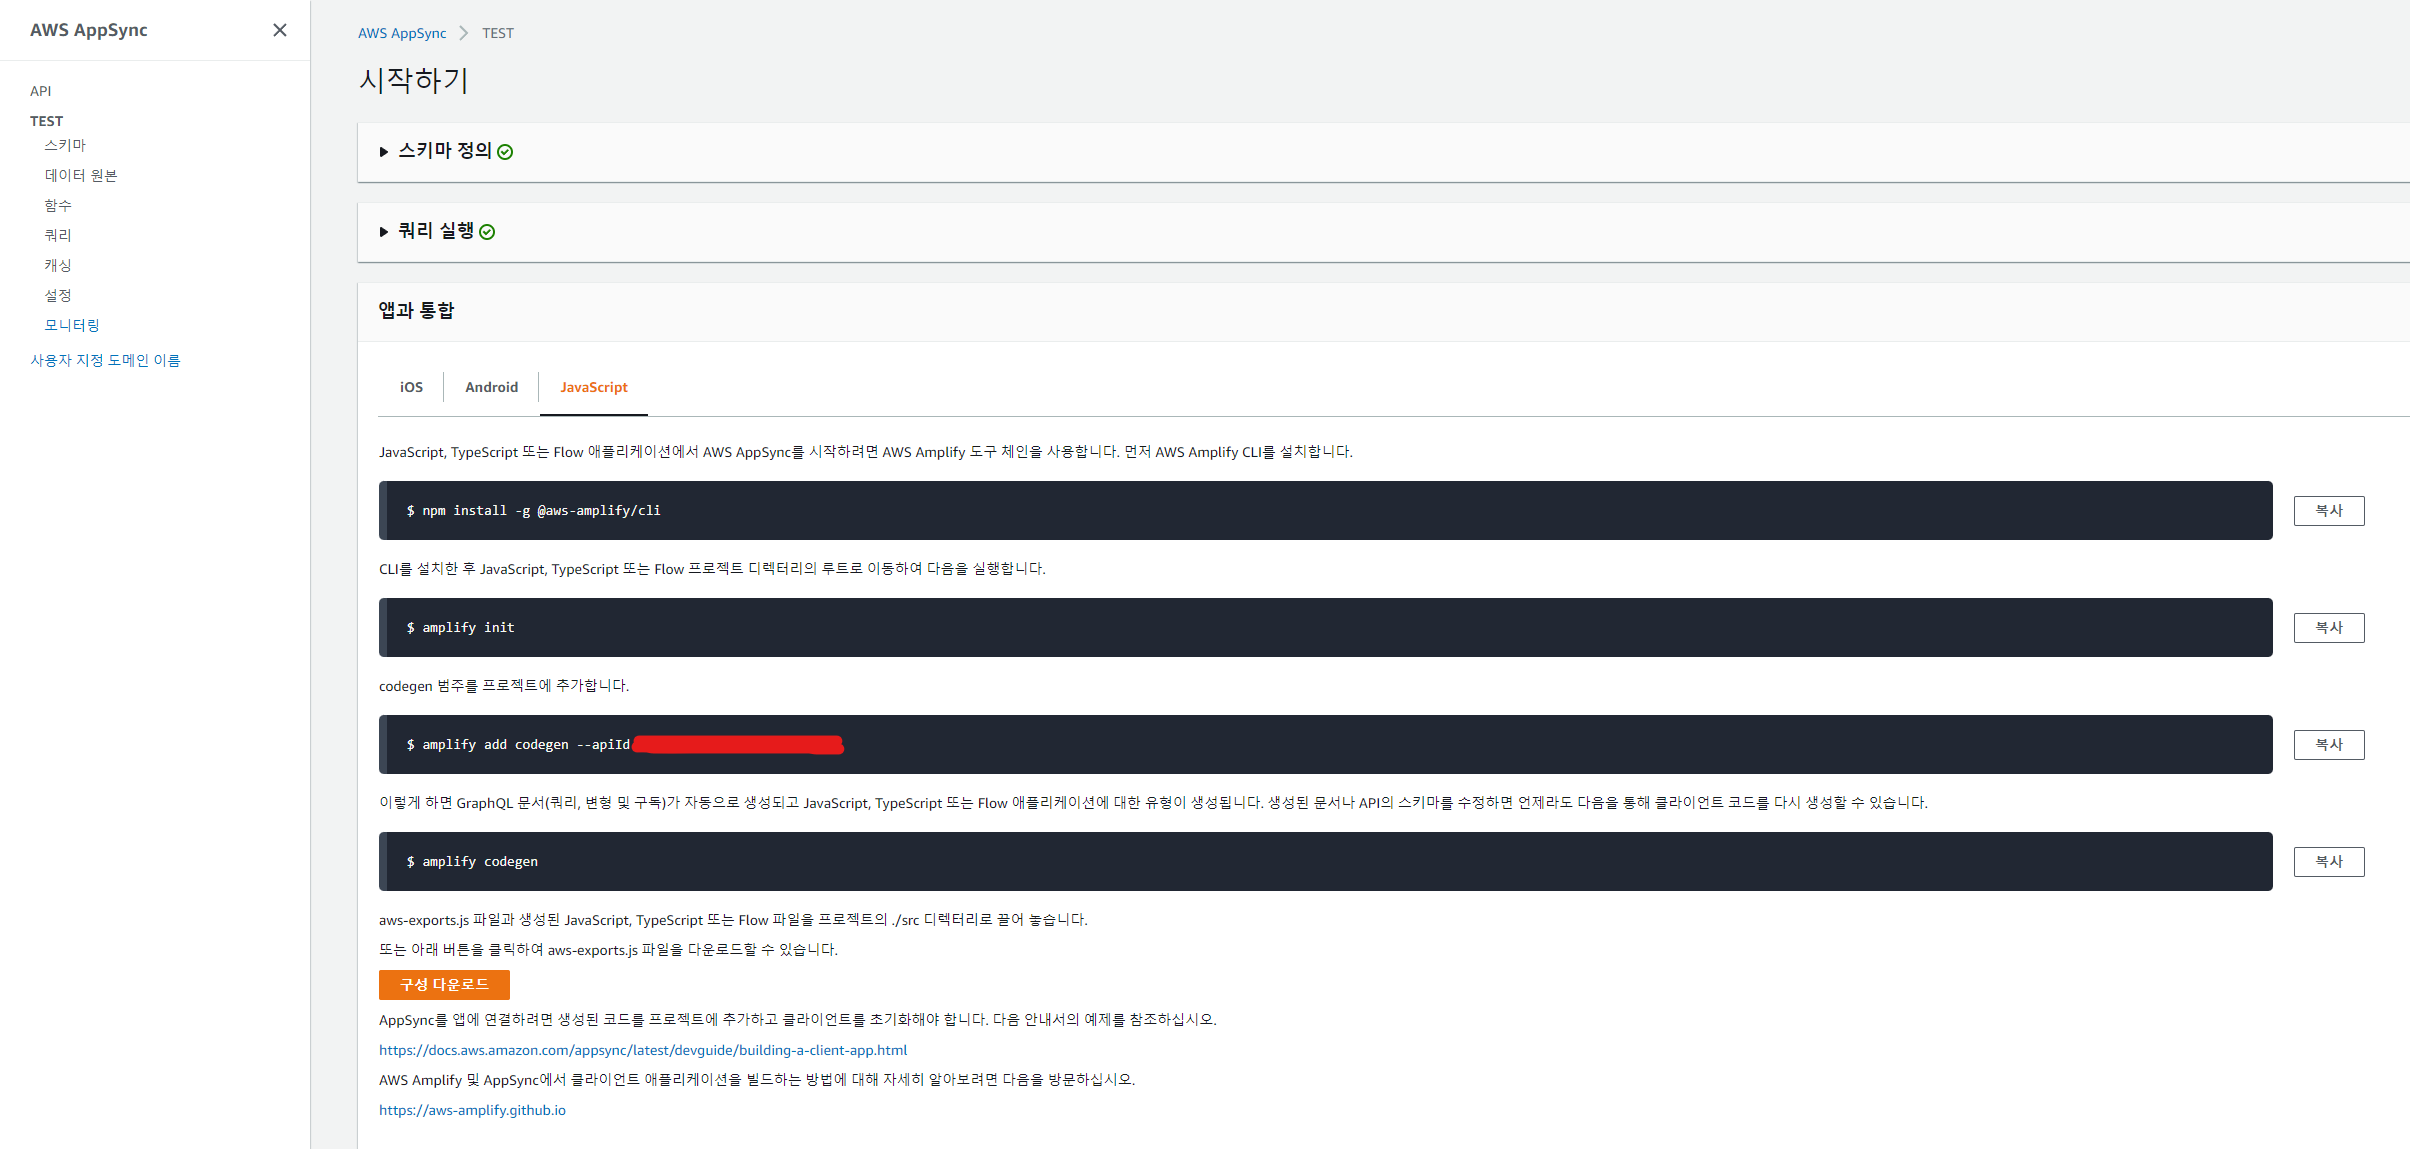
내용 중, codegen 부터 실행합니다.
amplify add codegen --apiId {API_KEY}
이 명령을 실행하면, 해당 API에서 사용하는 쿼리들을 선언한 변수들을 가지는 js 파일을 생성합니다.
아래는 파일을 생성할 경로를 지정하는 옵션이다. 위 명령을 실행하면 나옵니다.
√ Getting API details
Successfully added API ACaaS_AppSync_Service_Dev to your Amplify project
? Choose the code generation language target javascript
? Enter the file name pattern of graphql queries, mutations and subscriptions src/main/resources/static/js/graphql/**/*.js
? Do you want to generate/update all possible GraphQL operations - queries, mutations and subscriptions Yes
? Enter maximum statement depth [increase from default if your schema is deeply nested] 2
√ Downloaded the schema
√ Generated GraphQL operations successfully and saved at src\main\resources\static\js\graphql
codegen 설정이 잘못된 경우, 아래 명령을 이용해 수정이 가능합니다.
amplify configure codegen
? Choose the code generation language target javascript
? Enter the file name pattern of graphql queries, mutations and subscriptions src/main/resources/static/js/graphQL/*.js
? Enter maximum statement depth [increase from default if your schema is deeply nested] 2
위 작업을 마치게되면 아래와 같이 설정한 경로에 파일이 생성됩니다.

4. 데이터 가져오기
데이터 가져오는 방식은 Graph QL을 사용하는 것이며 다음 링크에서 관련 문서를 확인할 수 있습니다.
1. Amplify.js 추가
<script
  type="text/javascript"
  src="https://cdnjs.cloudflare.com/ajax/libs/aws-amplify/4.3.15-unstable.1/aws-amplify.js"
></script>
2. 소스 작성 ( js파일에 작성 후, html 에서 import 함 )
import awsconfig from './aws-exports.js';
import * as queries from './queries.js';
import * as mutations from './mutations.js';
import * as subscriptions from './subscriptions.js';

const Amplify = aws_amplify.API;
const graphqlOperation = aws_amplify.graphqlOperation;

// Considering you have an existing aws-exports.js configuration file
Amplify.configure(awsconfig);

/* 데이터 가져오기 */
const list = await Amplify.graphql({ query: queries.{queries_get_method}, variables: { deviceId: 'DD000000002010', eventType: '1' } });
console.log("♥♥♥♥♥ Dynamo Data get list (manual) ♥♥♥♥♥");
console.log("deviceId : " + list.data.getACaaS_AppSync_dev.deviceId);
console.log("eventType : " + list.data.getACaaS_AppSync_dev.eventType);
console.log("♥♥♥♥♥ Dynamo Data get list (manual) ♥♥♥♥♥");

/* 데이터 구독 */
// Subscribe to creation of Todo
const subscription = Amplify.graphql({ query: subscriptions.{subscriptions_on_create_method}, variables: { deviceId: 'DD000000002010', eventType: '3' } }
).subscribe({
    next: ({ provider, value }) => {
        console.log("♥♥♥♥♥ Subscribed Data : " + { provider, value } + " ♥♥♥♥♥")
        console.log(provider);
        console.log(value);
    },
    error: error => console.warn(error)
});

/* 데이터 구독 정지 */
// Stop receiving data updates from the subscription
//subscription.unsubscribe();

/* 데이터 세팅하기 */
/* const test_data = {
    deviceId: 'DD000000002015',
    eventType: '2'
};

const create = await Amplify.graphql({ query: mutations.{mutations.create_data_method}, variables: { input: test_data } });
console.log("♥♥♥♥♥ Dynamo Data create data (manual) ♥♥♥♥♥");
console.log("deviceId : " + create.data.{mutations.create_data_method}.deviceId);
console.log("eventType : " + create.data.{mutations.create_data_method}.eventType);
console.log("♥♥♥♥♥ Dynamo Data create data (manual) ♥♥♥♥♥"); */
대괄호로 처리된 영역은 codegen으로 생성된 js 파일 내에 자동으로 생성되어져 있는 메소드 들의 이름입니다.
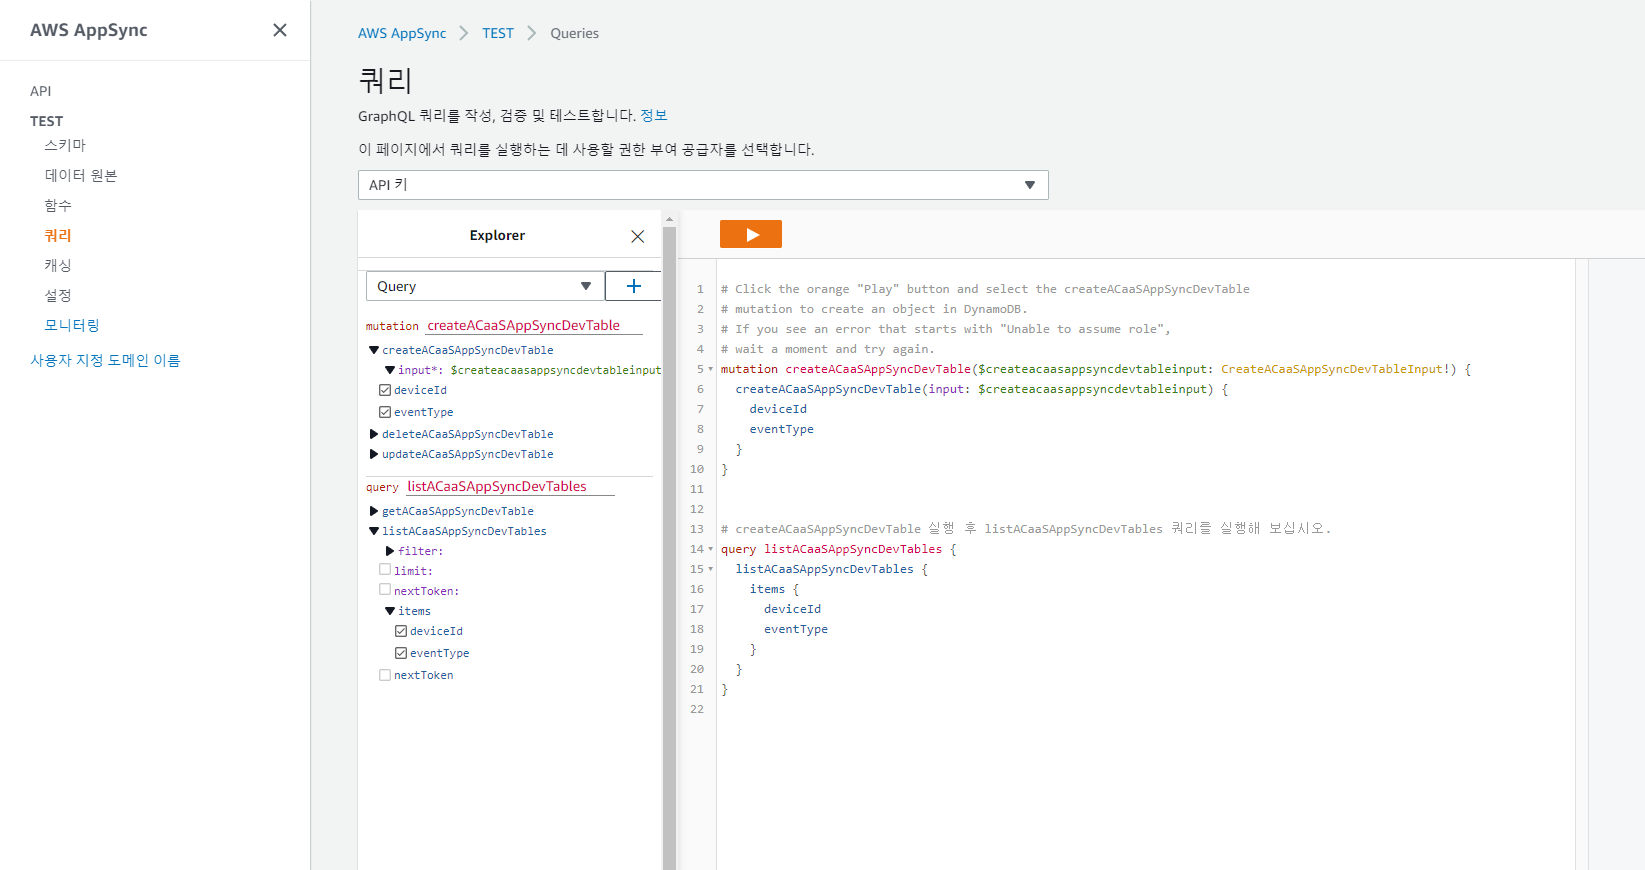
데이터 구독의 경우, Dynamo DB 연동된 AppSync라면 데이터가 생성되서 Dynamo DB 테이블에 들어오는 순간 이벤트가 fire 되어 Data Subscribe 하는 쪽에서 데이터를 받을 수 있습니다.
굳이 Dynamo DB에서 인덱스를 생성하지 않아도 AppSync 에서 테스트 쿼리를 날려 데이터를 넣을 수도 있으니 참고 하시면 됩니다.